Thursday, February 4, 2010

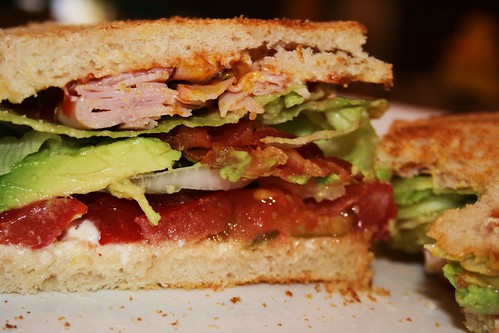
The Rooster's Fried Egg Sandwich

040

per his instructions.....
toast 2 slices of wheat bread
fry an egg....make sure it is all the way cooked
put mayo on the bread
cut slices of tomato (without cutting your finger...)
put the tomato on the bread
put the egg on top of the tomato
put some onion on top of the egg (YUK!!)
then some avocado
then some cooked bacon
then some ketsup and mustard
then some ham (YUM!)
then some lettuce.
THEN YOU EAT IT!
I think it all started when I was expecting The Rooster....I became very addicted to the Food Network. And the boy loves to cook. And he is pretty good at it too. He likes to make "special sauces" and all kinds of other things. The Farmer is known to ask The Rooster to whip him up a little something.....often. And The Rooster likes to do things for that Farmer.
He makes a killer....Fried Ramen Soup.....Oh, I think we will save that for another day.
Here's to Chef Rooster....that is one tasty sandwich !

Saturday, February 7, 2009

Traditional Red Chile Sauce - Chile Colorado

It is red chile season in my area, actually the tail end of it. Red chile is actually green chile that has been left on the plant until it is dry. Sun dried chile is the most flavorful chile. You can choose your heat level for red chile by choosing specific varities. Some are extreemly hot and other are mild. I am a fan of the mild;)
This is what the chile looks like before it is removed from the plant. Red chile is used for enchiladas, chile colorado, tamales, soups and for many other things. It is a very used chile in Mexico. A good basic red chile sauce is a must!
002
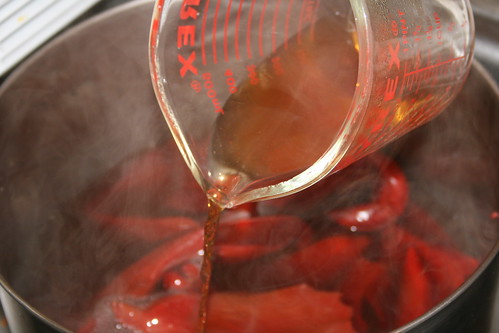
First, you need to removed the stem and seeds from the dried chile. Next, wash the chile and place it into a large stock pot. Cover with hot water and let sit for 20 minutes. Some like to let it sit overnight, but it is not necessary. The chile will become soft.

008
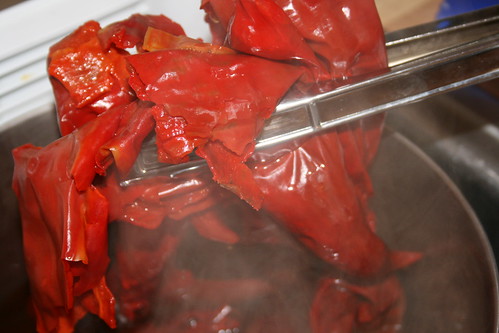
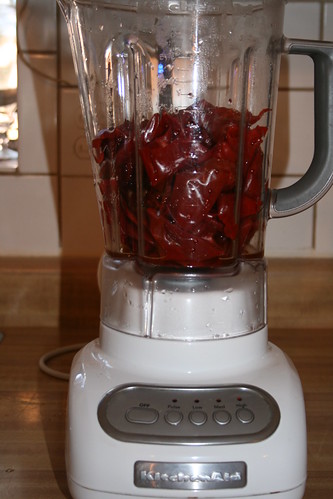
Next, remove chile from pan and water, save the water...you will need it. Transfer chile to a blender and fill half full with chile. Add a little of the "chile water."

004
Have a little of the "chile water" ready to add as you blend.

006
Next, add 1 clove of garlic, 1 t. salt, and 1 T. sugar and blend. Remember it is hot, I removed the small lid within the lid to the blender to allow the heat to escape. Blend for 2-3 minutes, adding the "chile water" until you reach your desired consistency. I like the sauce thick, others like it thin. You decide.

010
The "chile water" is really the trick to maintaining the flavor while thinning it.

012
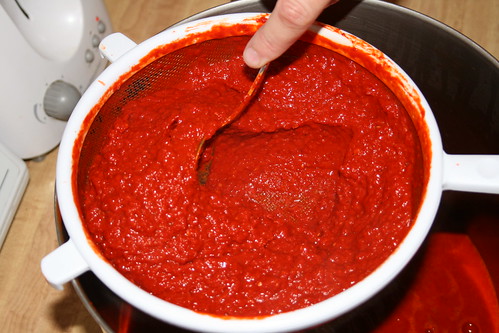
Next, pour into a strainer. This will separate the skin and seeds out of the actual sauce.
015
You will need to scrape the sauce with a spoon, forcing it through the strainer. This takes a little time. You will want to scrape until the remaining chile/skin and seeds, appear to be dry.

020
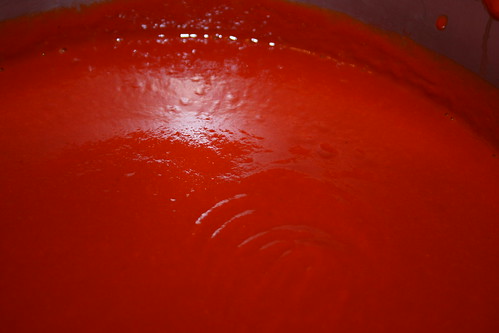
And this is what you will end up with....Red Chile Sauce. It is ready to make enchiladas!

Saturday, January 31, 2009

Ebelskivers


EBELSKIVERS
2 c. flour
1 t. baking powder
1/2 t. salt
1 T. sugar
4 eggs, separated
2 c. milk
4 T. butter, melted
(plus more for cooking)
filling of your choice, such as;
jam
chunky applesauce
pudding;)
peanut butter
sausage
any fruit
*basically anything you would like
in a bowl, whisk together the dry ingredients. In a small bowl lightly whisk the egg yolks, then add in the milk and the melted butter. Mix yolks into dry mixture, stir until combined.
In another bowl, beat egg whites on high until stiff peaks form, about 2-3 minutes. Fold into batter, gently. Put a little butter (doesn't need too much) into the well of the ebelskiver pan, then add 1 T. of batter, add 1 t. of filling on the top of the batter, then top with 1 T. of batter. To turn use skewers. Cook until golden brown. Sprinkle with powdered sugar.
Serve while hot...that is when they are the best.
The Darlings enjoyed dipping them in syrup.
YUM!!

Monday, October 20, 2008

Hot Chocolate Cake


This was such a fun cake to make! I opted for the Hot Chocolate version. Other than my whipped cream being a little soft, it turned out well. I have loved seeing all of the different cakes made by other Cake Slice Bakers, everyone is so creative. I think this is going to be great fun! Check out The Cake Slice Bakers!
Hot Chocolate Chiffon Cake
Makes an 8-inch triple layer cake
1/4 c. of neutral oil (ie. vegetable, canola, or soybean)
6 eggs separated
6 T. strong hot chocolate
2 t. of vanilla extract
1 and 1/3 c. of cake flour*
1 and 1/2 c. of sugar
1 t. of baking powder
1/2 t. of ground cinnamon
1/2 t. of salt
1/2 t. of cream of tartar
Cocoa powder or cinnamon for dusting
(*The recipe calls for cake flour and if you only have all-purpose flour on hand, you can substitute 3/4 cup (105 grams) all purpose flour plus 2 tablespoons (30 grams) cornstarch.)
Hot Chocolate Syrup
8 oz. hot water
2 T. Cocoa powder
2 T. sugar
Vanilla Whipped Cream
3 c. of heavy cream
1/3 c. of sugar
2 t. of vanilla
1. Preheat the oven to 350F degrees. Line the bottom s of three 8-inch round cake pans with parchment paper but do not grease.
2. In a medium bowl, combine the oil, egg yolks, espresso, and vanilla; whisk lightly to blend. In a large mixing bowl, sift together the flour, 1 cup of sugar, the baking powder, cinnamon, and salt. Set aside.
3. In the large bowl of an electric mixer, whip the egg whites with the cream of tartar on medium-low speed until frothy. Raise the mixer to medium high and gradually add the remaining 1/2 cup of sugar. Continue to beat until soft peaks form. Do not whip to stiff peaks or the cake will shrink upon cooling.
4. Add the espresso-egg mixture to the dry ingredients and fold together just until combined. Add one fourth of the egg whites and fold them gently into the batter. Fold in the remaining egg whites just until no streaks remain. Divide the batter among the pans.
5. Bake the cakes for 18 minutes or until a cake tester comes out clean. Allow the cakes to cool completely in the pans. Once cooled run a knife around the edge of the pans to release the cakes. Invert onto a wire rack and remove the parchment papers.
6. To assemble the cake, place one cake layer flat side up on a cake stand or platter. Soak the cake with 1/3 cup of the hot chocolate syrup. Spread 1 and 1/3 cups of whipped cream evenly over the top of the cake. Repeat with the next layer the same steps. Finally top with the third layer. Soak with syrup and frost the top and sides of the cake with the whipped cream.
7. To decorate the cake smooth out the whipped cream as much as possible on top. Lay a paper doily on top and sift cocoa powder or cinnamon over the doily to reveal a lacy detail.
Tuesday, October 14, 2008

Barefoot Bloggers - Pumpkin Risotto


A bit late...but here it is! The recipe was Butternut Squash Risotto, I did not have buttenut spuash and so I made a few changes. Pumpkin Risotto is what it turned out to be. It took a bit of time to prepare, did I love it?? It was okay, but not sure I would make it again. I enjoyed trying something new.
Pumpkin Risotto
1 small pumpkin, peeled, seeded and cut into 3/4" chunks
2 T. oilve oil
salt and pepper
6 c. chicken stock
6 T. butter
2 ounces bacon, diced
1/2 c. onion, minced
1 1/2 c. arborio rice
1 c. parmesan cheese
Preheat oven to 400 degrees. Mix pumpkin chunks with oil, salt and pepper. Pour onto a foil lined baking sheet and bake until tender, for about 25-30 minutes. Set aside. Meanwhile, heat the chicken broth. In a heavy pan, add butter, saute bacon and onion until clear but not dark. Add rice and mix to coat with oil. Add 2 c. of broth, simmer until liquid is absorbed. Repeat, until rice is cooked al dente, about 30 minutes total. Remove from heat and stir in pumpkin chunks and cheese. Mix well and serve.

Monday, September 29, 2008

Barefoot - Apple Turnover

Barefoot Blogger Bonus!

Now go ahead and say that three times, as fast as you can!! Apple Turnovers were the bonus for September. You don't have to twist my arm! I hope I won't be kicked out of the Barefoot Bloggers for this....but I do have a personal favorite recipe...and so I used mine, but staying within the same idea. Hope that is okay... These are the most incredible little turnovers I have ever tasted. You will LOVE them...I promise!

Apple Dumplings

(Pioneer Woman Style)

1 Granny Smith apple, peeled and cut into 8 slices

1 can cresent rolls

1 stick of butter

3/4 c. sugar

1 t. vanilla

cinnamon

1 sm. can Mountain Dew soda

Separate cresent rolls and roll a slice of apple into each roll. Place in a 8 x 8, greased, baking dish.

Melt butter and sugar together, bring to a boil and turn heat off. Add vanilla.

Pour sugar mixture over apple filled rolls. Pour Mountain Dew around edges of pan. Sprinkle with cinnamon.

Bake at 350 degrees for 40 minutes. Top with a scoop of ice cream and dust with nutmeg.
Enjoy!!


Thursday, September 25, 2008

Amazing Chunky Applesauce

I was anxious to try a new, chunky, applesauce this year. The Darlings haven't been too fond of applesauce. This one they love! Not only is it perfectly beautiful, it is perfectly yummy too!

A new use for applesauce! Carmel Apple Pie Sunday. A little ice cream, with a little applesauce, then a little carmel topping and sprinkled with pumpkin pie spice. Wow! was that ever good!!
Amazing Chunky Applesauce
3-4 pounds of apples, peeled, cored and quartered
(I love Golden Delecious apples for this)
4 strips of lemon peel
juice of 1 lemon
1 cinnamon stick
1/4 c. brown sugar
1/4 c. white sugar
1 c. water
1/2 t. salt
Place all ingredients in a large (heavy) pot. Cover and bring to a boil. Lower heat and simmer for 20-30 minutes. Remove from heat, remove cinnamon sticks and lemon peels. Mash with a potato masher until desired consistency. Pour into clean jars, add lids and rings then process for 25 minutes in water bath.